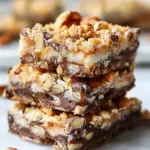
Introduction to 7-Layer Bars
When it comes to homemade desserts that bring a little nostalgia and a whole lot of flavor, 7-layer bars stand out as a must-try for dessert lovers. If you’ve ever indulged in a treat that combines the richness of chocolate, the nuttiness of coconut, and a burst of sweetness all in one bite, you know exactly what makes these bars so special. Originating from a classic American recipe, they’ve been delighting taste buds for generations, making them a favorite at potlucks, parties, and family gatherings.
Why 7-Layer Bars are a must-try for homemade dessert lovers
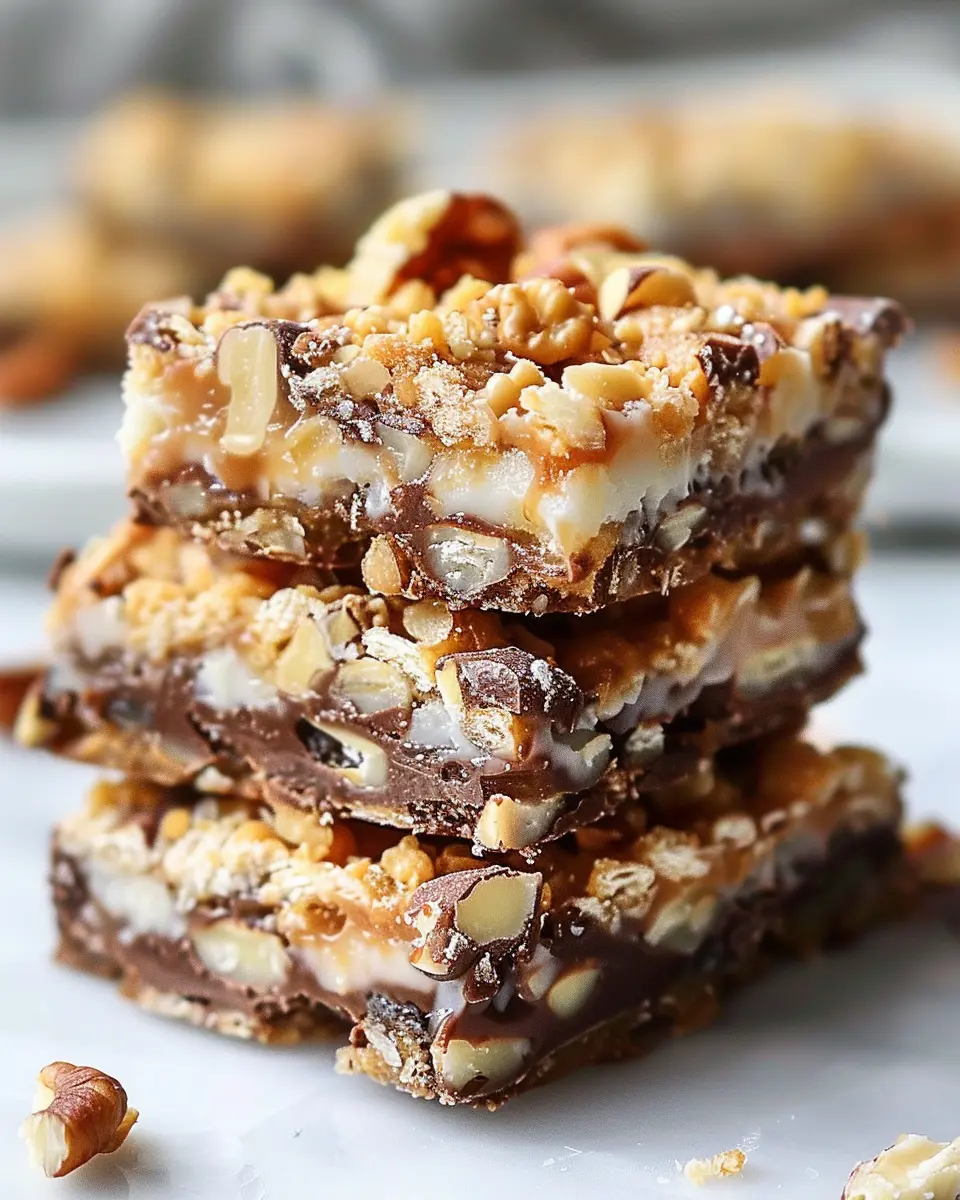
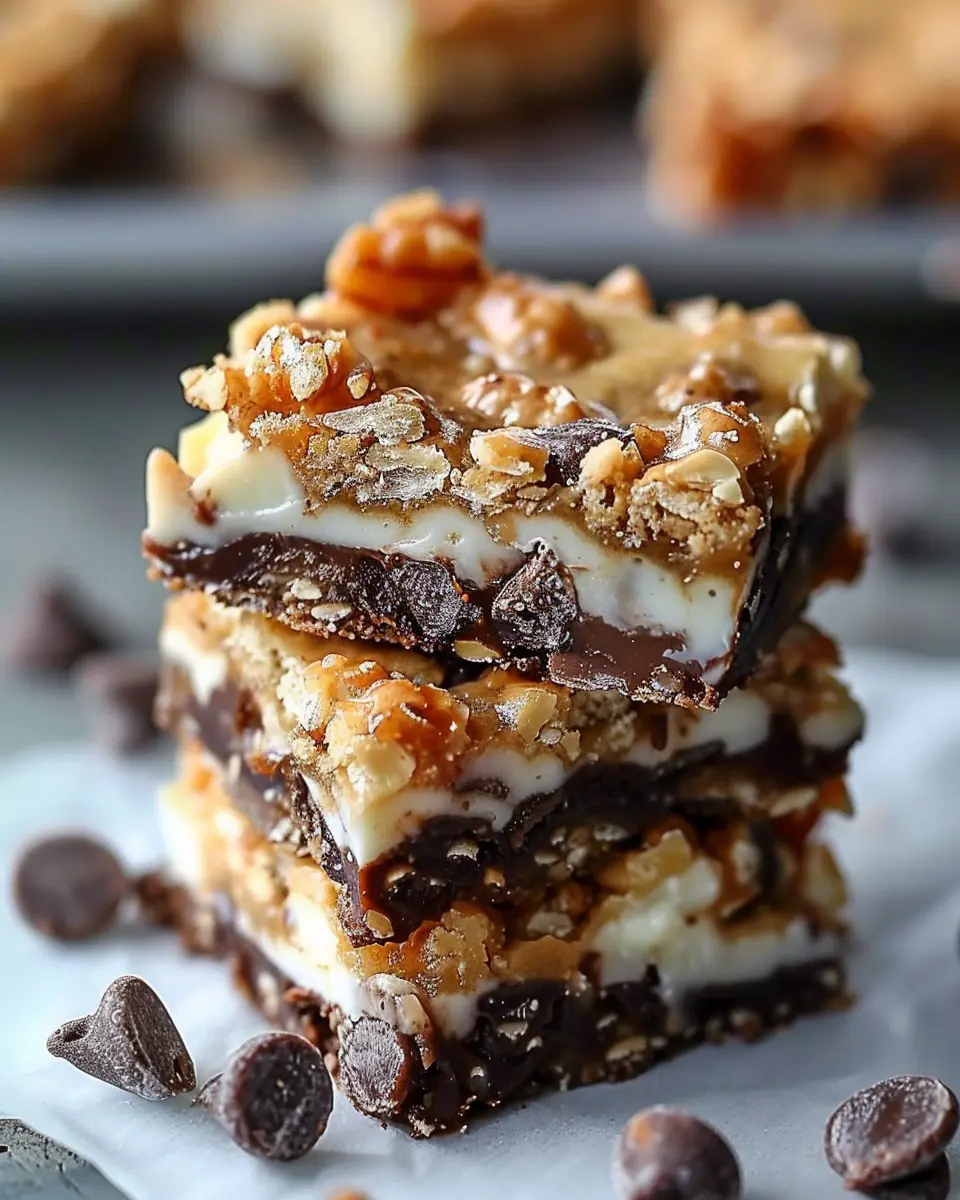
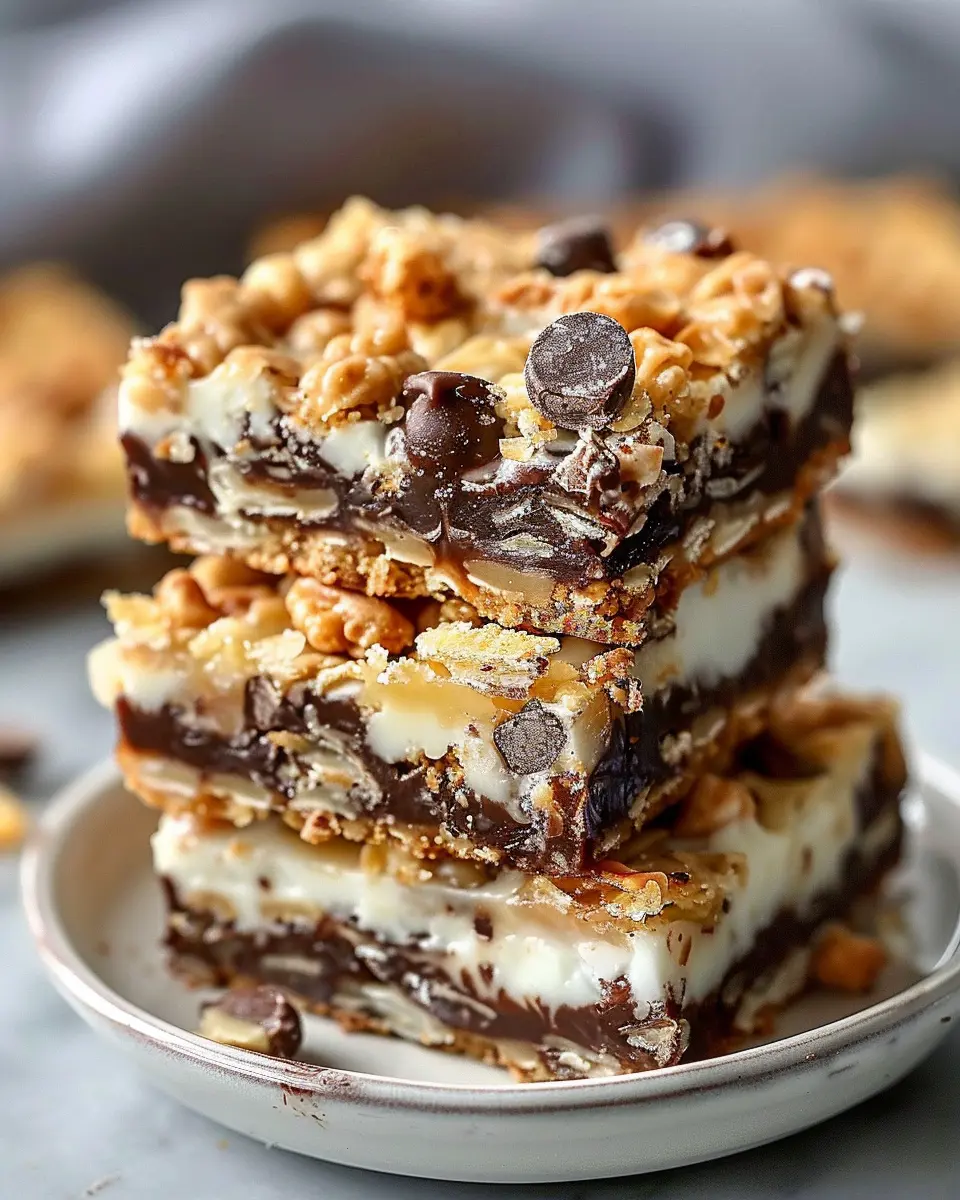
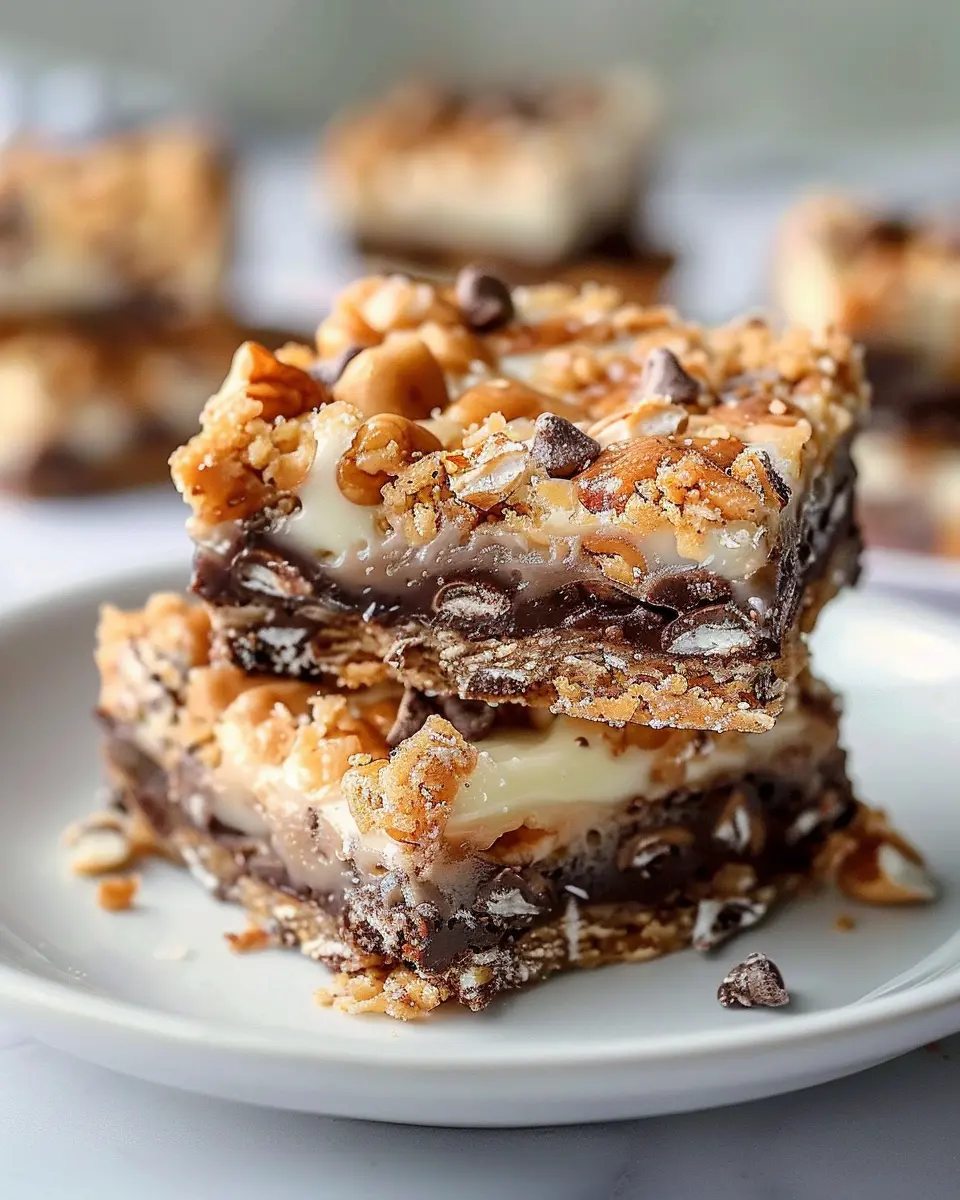
So, what makes 7-layer bars so irresistible? Firstly, their combination of flavors and textures is simply unparalleled. With layers of graham cracker crumbs, creamy sweetened condensed milk, semi-sweet chocolate chips, and crunchy nuts, there’s a little something for everyone. Every bite offers a delightful chewiness, a hint of crunch, and a touch of sweetness—what more could you want in a dessert?
You don’t even have to be a pro in the kitchen to whip these up. With a straightforward recipe that features just a few ingredients, these bars are ridiculously easy and require minimal skill. According to baking enthusiasts at The Spruce Eats, the beauty of 7-layer bars lies in their simplicity; you only need to layer your ingredients and pop them into the oven. In about 30 minutes, you can have a delicious dessert ready to impress your friends and family.
Another great aspect of 7-layer bars is their versatility. You can switch up ingredients to fit your preferences or dietary restrictions. Want to add some peanut butter for extra flavor? Go for it! Prefer to use white chocolate instead of semi-sweet? You can do that too! The possibilities are endless, giving you the creative freedom to personalize your bars.
One last tip: these bars are perfect for making ahead and storing. Wrapped tightly, they can last several days, making them an ideal choice for busy young professionals who want to prepare snacks for the week. So why not give it a go? Your taste buds will thank you.
Ingredients for 7-Layer Bars
When you’re ready to indulge in a delightful treat, 7-layer bars are a fantastic choice. Layered with flavors and textures, they’re perfect for gatherings or a cozy night in. Here’s what you’ll need to create these delicious bars:
Essential Ingredients
- Graham Cracker Crumbs: 1 ½ cups, providing the perfect crunchy base.
- Unsweetened Coconut Flakes: 1 cup, adding a chewy, tropical twist.
- Semi-Sweet Chocolate Chips: 1 cup, for that rich, indulgent flavor that everyone loves.
- Butterscotch Chips: 1 cup, which brings a sweet, buttery element to the mix.
- Chopped Nuts: 1 cup (almonds, walnuts, or pecans work great!), adding a satisfying crunch.
- Sweetened Condensed Milk: 1 can, holding the layers together with its creamy sweetness.
- Butter: ½ cup, melted, acting as the glue for the crust and enhancing flavor.
Once you gather these ingredients, you’ll be on your way to creating a batch of homemade 7-layer bars that your friends and family will adore. If you’re curious about alternative combinations or want to explore similar recipes, check out this guide for inspiration on flavor swaps and additional layers!
Preparing 7-Layer Bars
Creating the deliciously indulgent 7-layer bars is not only easy, but it’s also a fun kitchen adventure! These bars are perfect for gatherings or for satisfying your sweet tooth after a long day. So, let’s get ready to whip up some of these scrumptious treats by following this straightforward guide.
Gather Your Ingredients
Before diving in, make sure you have everything you need. The beauty of 7-layer bars lies in their versatility, but here are the classic ingredients you’ll require:
- 1 ½ cups graham cracker crumbs
- ½ cup unsalted butter, melted
- 1 cup sweetened flaked coconut
- 1 cup semisweet chocolate chips
- 1 cup butterscotch chips
- 1 cup chopped nuts (walnuts or pecans work great)
- 1 can (14 ounces) sweetened condensed milk
Having your ingredients organized will not only make the process smoother but also more enjoyable. For more ideas on variations, check out this comprehensive list of treat variations to inspire your creativity!
Prepare the Graham Cracker Crust
Now that your ingredients are prepped, it’s time to create that irresistible base.
- Preheat your oven to 350°F (175°C). This is an essential step to ensure that your bars bake evenly.
- In a mixing bowl, combine the graham cracker crumbs with the melted butter until thoroughly mixed. The mixture should resemble wet sand and hold together when pressed.
- Spread the graham cracker mixture evenly into the bottom of a greased 9×13-inch baking pan. Use a spatula to press it down firmly. This will create a solid foundation for your 7-layer bars.
A solid crust not only enhances flavor but also provides the support needed to hold all those delicious layers together!
Layer the Toppings Seamlessly
This is where the magic happens! Each layer contributes to the rich flavor and texture.
- Start with the coconut: Evenly sprinkle the sweetened coconut over the crust.
- Add the chocolate chips next, followed by the butterscotch chips, making sure to spread them across the entire surface.
- Finish it off with chopped nuts: These will bring a delightful crunch that complements the gooey layers beneath.
Feel free to customize these layers according to your preferences! For example, if you’re not a fan of nuts, you can skip them or replace them with your favorite dried fruits. The beauty of 7-layer bars is that they are as versatile as they are delicious.
Pour on the Sweetened Condensed Milk
Next comes the glue that holds all those layers together—sweetened condensed milk!
- Open the can of sweetened condensed milk and slowly drizzle it over the layered ingredients. Try to cover everything as evenly as possible. This will help bind all the layers, creating that deliciously gooey texture.
Bake to Perfection
Now it’s time for the most exciting part—baking!
- Place your pan in the preheated oven and let it bake for about 25-30 minutes. You’ll know it’s ready when the edges are golden brown and the center is set.
- Once baked, remove it from the oven and allow it to cool completely in the pan before cutting into bars.
Allowing your bars to cool is crucial. Not only does this help them set, but it also makes them easier to cut into perfect squares.
There you have it! The steps for preparing your delightful 7-layer bars. Remember, sharing them can bring a smile to friends and families, but if you feel like keeping them all for yourself, we won’t judge! Enjoy your baking adventure!
Variations on 7-Layer Bars
Creating delicious variations of 7-layer bars allows you to customize them to meet dietary needs or simply experiment with new flavors. Here are two fantastic variations to consider: nut-free and vegan options.
Nut-Free 7-Layer Bars
For those with nut allergies or simply looking to avoid nuts, you can still enjoy the delightful layers of this classic treat. Here’s how to whip up nut-free 7-layer bars:
- Crust: Use crushed graham crackers or a similar cookie sans nuts.
- Layers: Substitute your regular chocolate chips with carob chips or sunflower seed chocolate chips to maintain that sweet chocolatey flavor.
- Toppings: Replace any nuts with seeds like pumpkin or sunflower for added crunch.
- Sweeteners: Use a nut-free granola for extra sweetness and texture.
Don’t worry—these bars will still be a hit, and you can find plenty of great nut-free recipes online (check out resources like the Allergy Free Alaska site for inspiration).
Vegan 7-Layer Bars
If you’re leaning towards plant-based options, vegan 7-layer bars are not just possible—they’re utterly scrumptious! Here’s how to make them:
- Butter Substitute: Replace butter with coconut oil or vegan margarine for a creamy base.
- Sweeteners: Opt for maple syrup or agave instead of honey, keeping the components completely vegan.
- Chocolate Choices: Use dairy-free chocolate chips to ensure every bite is plant-friendly.
You might wonder if these vegan 7-layer bars will taste as good—spoiler alert: they do! Many people find them just as satisfying, if not more so. For additional vegan inspiration, sites like Minimalist Baker offer great recipes.
So, which variation are you excited to try? Trust me, whichever route you choose, these bars will be the perfect sweet indulgence!
Baking notes for 7-Layer Bars
Making 7-layer bars isn’t just about following a recipe; it’s about the little touches that can elevate your baking experience. Here are some helpful tips to ensure your bars come out perfectly every time.
Prep Your Ingredients
- Room Temperature: Make sure your butter is at room temperature for easy blending. If you forgot to pull it out ahead of time, you can microwave it for a few seconds, just enough to soften, not melt.
- Types of Layer: Feel free to customize your layers! Some people love adding chopped nuts or throwing in a different type of chocolate. The key is to maintain the balance of sweet and rich flavors.
Don’t Skip the Baking Sheet Lining
Using parchment paper or aluminum foil to line your baking dish makes for easy removal. Plus, it saves you time on cleanup. You can read more about the benefits of lining baking sheets here.
Allow to Cool
Patience is essential! Make sure to let your 7-layer bars cool completely before cutting. This helps them set properly and makes for cleaner slices.
With these tips, you’re bound to impress your friends and family with these delicious desserts. Happy baking!
Serving Suggestions for 7-Layer Bars
These heavenly 7-layer bars offer a delightful symphony of flavors and textures that make them irresistible. While they are delicious on their own, the right serving suggestions can elevate your experience.
Pairing Ideas for Enjoyment
For a cozy night in, serve your 7-layer bars alongside a steaming mug of hot chocolate or a chilly glass of almond milk. The rich cocoa and nutty flavors complement the sweetness of the bars beautifully.
If you’re hosting a gathering or a casual get-together, consider these combinations:
- Coffee or Tea: A warm cup of coffee or spiced chai balances the sweetness and adds a layer of comfort to your dessert spread.
- Fresh Fruit: The addition of some tart berries or slices of banana provides a refreshing contrast to the richness of the bars.
Creative Serving Style
Cut your 7-layer bars into bite-sized pieces for easy sharing. Stack them on a decorative platter, or even try layering them within a clear glass for a playful dessert presentation. This not only looks appealing but also invites guests to reach for more.
By experimenting with these serving suggestions, you’re sure to impress friends and family with your fun and thoughtful approach to this classic treat! For more creative dessert ideas, check out blogs like The Kitchn or Serious Eats.
Tips for Making Perfect 7-Layer Bars
Creating perfect 7-layer bars can be both a delightful and rewarding experience. Here are some friendly tips to help you achieve just that:
Choose Quality Ingredients
Using high-quality ingredients will elevate your dessert. Go for fresh unsweetened coconut flakes and chocolate chips; they make a noticeable difference in texture and flavor. If you’re unsure what to buy, check out reviews on Bon Appétit for trustworthy recommendations.
Layering is Key
When layering your ingredients, make sure to distribute them evenly across the pan. A good rule of thumb is to sprinkle each layer slowly, allowing it to settle. This ensures every bite is a delicious combination of flavors—no one wants a mouthful of just nuts, right?
Don’t Rush the Baking Process
Patience is your friend! Bake your 7-layer bars until they are golden brown. This typically takes about 25-30 minutes. Keeping an eye on the color will help you avoid any burnt edges or raw layers. Remember, ovens vary, so you may need to adjust your cooking time slightly.
Cooling is Crucial
Once baked, let your bars cool completely in the pan before cutting. This step solidifies all the layers, making it easier to slice clean squares. I often find that cutting them while still warm leads to a sticky mess—definitely not the presentation you want!
Experiment with Flavors
Feel free to play with the ingredients! Add your favorite nuts, or even try a hint of espresso powder for a deeper flavor. The flexibility of 7-layer bars allows for creativity; you might just find your next favorite combination!
By following these tips, your 7-layer bars will be a hit at gatherings or just as a special treat for yourself. Happy baking!
Time details for 7-Layer Bars
Preparation time
To kick off your adventure in making 7-layer bars, set aside about 20-25 minutes for preparation. This time includes gathering your ingredients, greasing your pan, and layering those delicious treats. Enjoy this moment—pop on some music or a podcast while you mix and measure.
Baking time
Once you have your layers beautifully arranged, the magic continues in the oven for 25-30 minutes. You’ll want to keep an eye on them to ensure that they come out perfectly golden and slightly set.
Total time
In total, you’re looking at about 50-55 minutes from start to finish, which is a small investment for such a delightful treat. For a comprehensive guide and tips on how to achieve the best texture, check out these expert baking techniques.
Whether you choose to enjoy them alone or share with friends, you’ll surely realize that the 7-layer bars are worth every minute!
Nutritional information for 7-Layer Bars
When indulging in delicious 7-layer bars, it’s great to know what you’re treating yourself to. Here’s a quick breakdown of their nutritional values:
Calories
A typical serving of 7-layer bars contains about 300-350 calories. This makes them a rich dessert option. Eating them in moderation is key, especially if you’re keeping an eye on your daily caloric intake.
Protein
These scrumptious bars offer a modest amount of protein, usually around 3-5 grams per serving, thanks to ingredients like nuts and chocolate. If you’re looking to add a protein boost, consider pairing them with some Greek yogurt or a protein shake for a satisfying treat.
Sodium
In terms of sodium, 7-layer bars contain about 150-200 mg per serving. While this isn’t excessive, it’s always wise to be mindful of your sodium intake, especially if you’re watching your heart health. Check out the American Heart Association’s guidelines for more on sodium consumption.
With a little knowledge, you can enjoy this indulgent dessert while still staying aligned with your nutritional goals!
FAQs about 7-Layer Bars
How do I store leftover 7-layer bars?
Storing 7-layer bars is straightforward, and doing it right can help maintain their deliciousness! If you have any leftovers, let them cool completely at room temperature. Then, cut them into squares, place them in an airtight container, and store them in the refrigerator. They should last about a week. Want to save them for longer? Consider freezing your 7-layer bars. Just wrap the squares in plastic wrap, place them in a freezer-safe bag, and voilà! They can be enjoyed for up to three months. Thaw in the fridge overnight before indulging!
Can I customize the layers in my 7-layer bars?
Absolutely! One of the best parts about 7-layer bars is their versatility. You can swap out layers to better suit your taste or dietary needs. For instance, if you’re not a fan of coconut, you could replace it with extra chocolate chips or nuts. You can even experiment with flavored extracts, such as almond or peppermint, to add a unique twist. If you’re looking for more customization ideas, check out this guide on baking substitutions for helpful insights.
What’s the best way to cut 7-layer bars?
Cutting 7-layer bars can be a bit sticky, but here’s a pro tip: use a sharp knife that’s been lightly greased with cooking spray or butter. This helps the knife glide through without tearing the layers apart. To achieve clean lines, cut the bars when they’re cold—right out of the fridge. For a fun presentation, consider using cookie cutters for different shapes, especially if you’re serving them at a gathering. Happy baking!
Conclusion on 7-Layer Bars
In wrapping up our delicious journey through 7-layer bars, it’s clear these treats are more than just a dessert; they’re a celebration of flavor and texture. Each layer brings its own twist, creating a harmonious blend that’s hard to resist. Perfect for gatherings or a sweet afternoon pick-me-up, these bars are versatile and can be tailored to your preferences.
Think about incorporating your favorite nuts or swapping out chocolate chips for butterscotch. As you try this recipe, remember to savor the process—baking should be as enjoyable as it is rewarding. Ready to indulge? Check out our other dessert recipes for more inspiration!
Print7-Layer Bars: Indulgent Treats to Delight Your Taste Buds
These 7-Layer Bars are the perfect combination of sweet and decadent, sure to satisfy any dessert craving.
- Prep Time: 15 minutes
- Cook Time: 30 minutes
- Total Time: 45 minutes
- Yield: 24 bars 1x
- Category: Dessert
- Method: Baking
- Cuisine: American
- Diet: Vegetarian
Ingredients
- 1 cup graham cracker crumbs
- 1 cup sweetened shredded coconut
- 1 cup chocolate chips
- 1 cup butterscotch chips
- 1 can (14 ounces) sweetened condensed milk
- 1/2 cup chopped walnuts
- 1/2 cup butter, melted
Instructions
- Preheat the oven to 350°F (175°C).
- In a bowl, mix the graham cracker crumbs with melted butter and press into the bottom of a greased 9×13 inch baking dish.
- Layer the shredded coconut, chocolate chips, butterscotch chips, and walnuts over the crust.
- Pour the sweetened condensed milk evenly over all layers.
- Bake for 25-30 minutes or until the top is golden brown.
- Let cool before cutting into bars.
Notes
- For a variation, try adding different nuts or dried fruits.
- Ensure the bars are fully cooled to set before cutting.
Nutrition
- Serving Size: 1 bar
- Calories: 220
- Sugar: 20g
- Sodium: 70mg
- Fat: 10g
- Saturated Fat: 6g
- Unsaturated Fat: 4g
- Trans Fat: 0g
- Carbohydrates: 33g
- Fiber: 1g
- Protein: 2g
- Cholesterol: 15mg
Keywords: 7-Layer Bars, dessert, treats