Introduction to Apple Slab Pie
When you’re craving something comforting and delicious, apple slab pie will always rise to the occasion. This delightful dessert takes the classic apple pie and gives it a modern twist by spreading it out across a sheet pan. The result? A generous, shareable treat that’s perfect for gatherings or cozy nights at home.
Why Apple Slab Pie is the Ultimate Comfort Food
Imagine a warm, golden crust enveloping a cinnamon-spiced apple filling, just waiting to bring a smile to your face. That’s the charm of apple slab pie. There’s something deeply satisfying about the way it brings people together—whether it’s a family dinner or a potluck with friends.
The beauty of this dessert is not only in its taste but also in its simplicity. The rolled-out dough is forgiving, making it accessible for bakers of all skill levels. You don’t need to worry about individual pie crusts falling apart; a slab pie allows you to focus on creating a delicious filling that can be customized to your liking!
-
Feed a Crowd: With its expansive size, an apple slab pie means no one goes home hungry. It offers generous slices that can be served warm with a scoop of vanilla ice cream or a dollop of whipped cream.
-
Versatility: While the traditional recipe usually calls for Granny Smith apples, you can experiment with different varieties like Honeycrisp or Fuji. Toss in some cranberries for tartness or a sprinkle of nuts for texture—get creative!
-
Easy Prep: Unlike classic pies that require careful crimping and shaping, slab pies can be assembled quickly. Just roll out the dough, layer your filling, and pop it in the oven. Voila!
This dessert is not only a feast for the taste buds but also a joy for the eyes, with its bubbling apple filling peeking through a beautifully golden crust. Need more convincing? Check out this link about the benefits of baking at home to discover how it can become a relaxing, fulfilling hobby.
So gather your ingredients, preheat that oven, and get ready to indulge in a slice of nostalgia with your very own apple slab pie!
Ingredients for Apple Slab Pie
When you’re ready to bake a delicious apple slab pie, it’s essential to gather all the right ingredients. Let’s break it down into two main components: the crust and the filling, ensuring the perfect balance of flavors and textures.
Essential ingredients for the crust
For the ideal flaky crust, you’ll need:
- All-purpose flour: About 3 cups will give your crust some structure.
- Unsalted butter: 1 cup (2 sticks) for that rich flavor and flakiness.
- Sugar: A touch, around 1/4 cup, to enhance the dough’s sweetness.
- Salt: Just 1 teaspoon to elevate the taste.
- Ice water: Up to 1/2 cup, to bring the dough together without overheating it.
This combination creates a beautiful, tender crust that’s the perfect canvas for your filling!
Key ingredients for the apple filling
Now, let’s focus on the star of the show—the filling. You’ll want:
- Apples: About 6 cups of sliced, tart apples like Granny Smith or Honeycrisp for the best flavor.
- Sugar: 3/4 cup, adding sweetness to balance the tartness of the apples.
- Cinnamon: 1 tablespoon for that cozy, aromatic spice.
- Nutmeg: A pinch to deepen the flavor.
- Lemon juice: 2 tablespoons to help brighten the apples and prevent browning.
With these ingredients combined, your apple slab pie will be mouthwatering and nostalgic, reminiscent of apple picking in the fall. Who doesn’t love that?
For more inspiration and tips, check out this site on baking basics. Happy baking!
Preparing Apple Slab Pie
Making an apple slab pie from scratch isn’t just about following a recipe; it’s about creating a comforting experience full of inviting aromas and flavors. Let’s dive right into the process!
Making the crust from scratch
Kick things off by preparing your crust, as it sets the foundation for your delicious apple slab pie. You’ll need:
- 2 1/2 cups all-purpose flour
- 1 teaspoon salt
- 1 tablespoon sugar
- 1 cup (2 sticks) unsalted butter, chilled and diced
- 6 to 8 tablespoons ice water
- In a large bowl, combine the flour, salt, and sugar. Tossing these dry ingredients together ensures an even blend.
- Add the butter cubes into the mix. Using a pastry cutter or your fingers, blend until you achieve a crumbly texture—think of it like little pebbles rather than sand!
- Slowly incorporate the ice water, one tablespoon at a time, just until the dough holds together. Be mindful not to overmix, which can lead to a tough crust.
- Wrap the dough in plastic wrap and refrigerate for at least an hour. This resting period allows the gluten to relax, making your crust tender.
For a deeper dive into perfecting pie crusts, consider checking out resources from King Arthur Baking.
Preparing the apple filling
While the crust chills, it’s time to prepare the star of the show: the apple filling. You’ll want:
- 6 to 8 medium apples (a mix of sweet and tart works wonders)
- 3/4 cup sugar
- 2 tablespoons flour (to thicken)
- 1 teaspoon cinnamon
- 1/4 teaspoon nutmeg
- 2 tablespoons lemon juice
- 1 tablespoon butter, diced
- Peel, core, and slice the apples into thin wedges. This not only helps them cook evenly but also gives more surface area for delicious caramelization.
- In a large bowl, toss the apple slices with sugar, flour, cinnamon, nutmeg, and lemon juice. The lemon juice will help keep the apples from browning and add a nice zing to the flavor.
- Let this mixture sit for about 10-15 minutes, allowing it to draw out some of the juices. You’ll end up with a sweet, flavorful filling that balances the buttery crust perfectly.
Assembling your apple slab pie
Once your crust and filling are ready, it’s time for assembly. Here’s how to bring it all together:
- Preheat your oven to 375°F (190°C).
- Roll out your chilled dough on a flour-dusted surface to fit a 13×18-inch baking sheet. Place the rolled dough onto the sheet, pressing it into the corners and up the sides.
- Pour the apple filling into the crust, making sure to distribute it evenly. Dot with the diced butter for an extra richness.
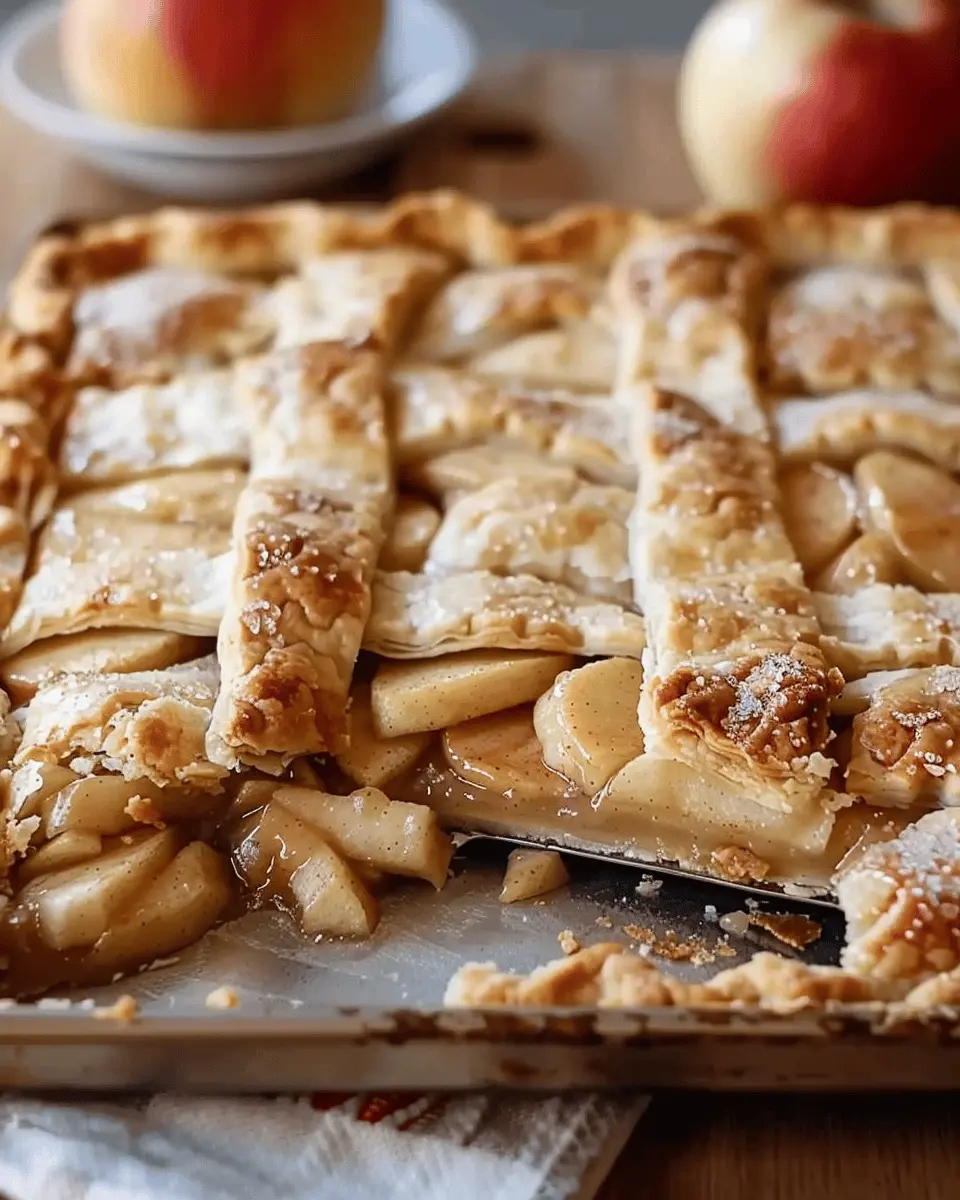
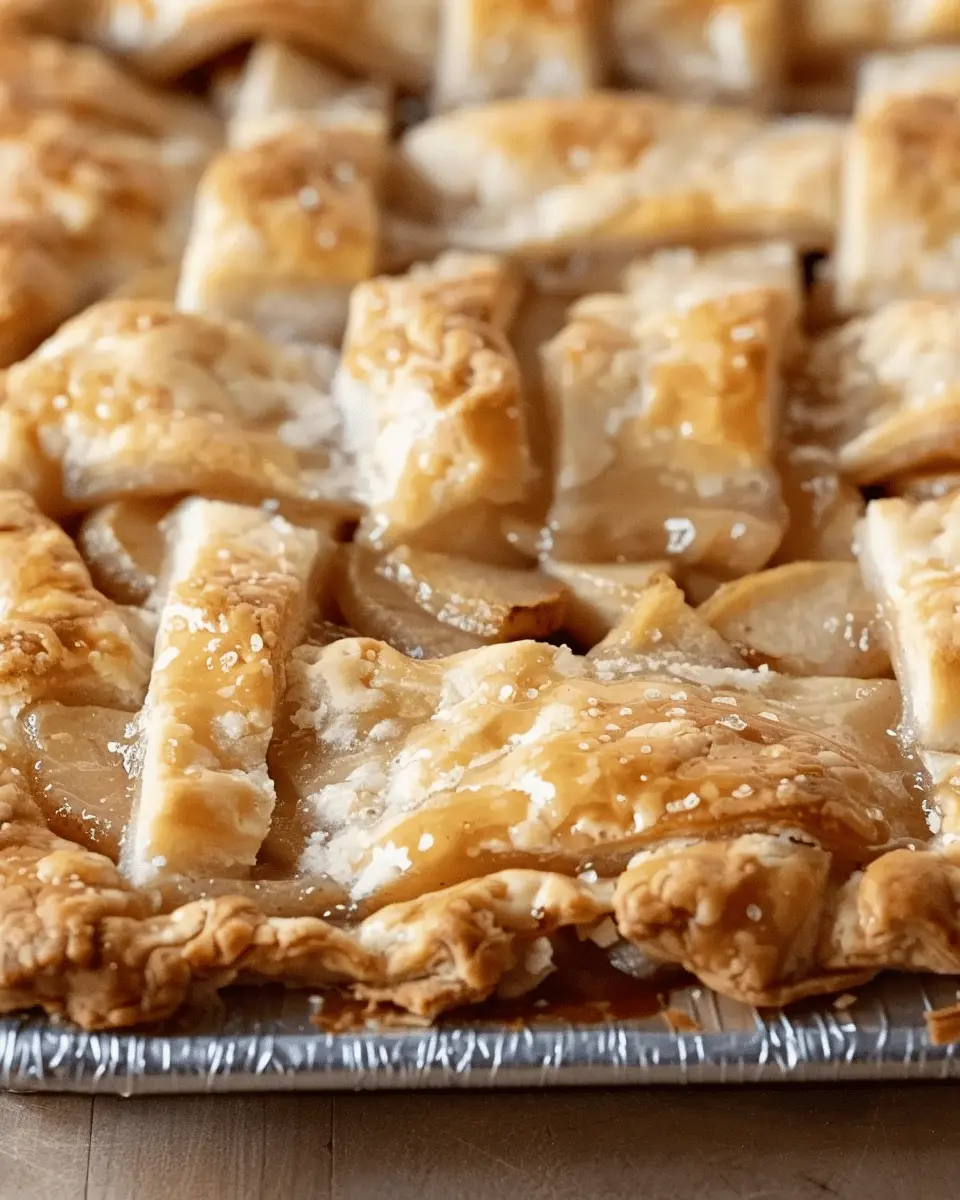
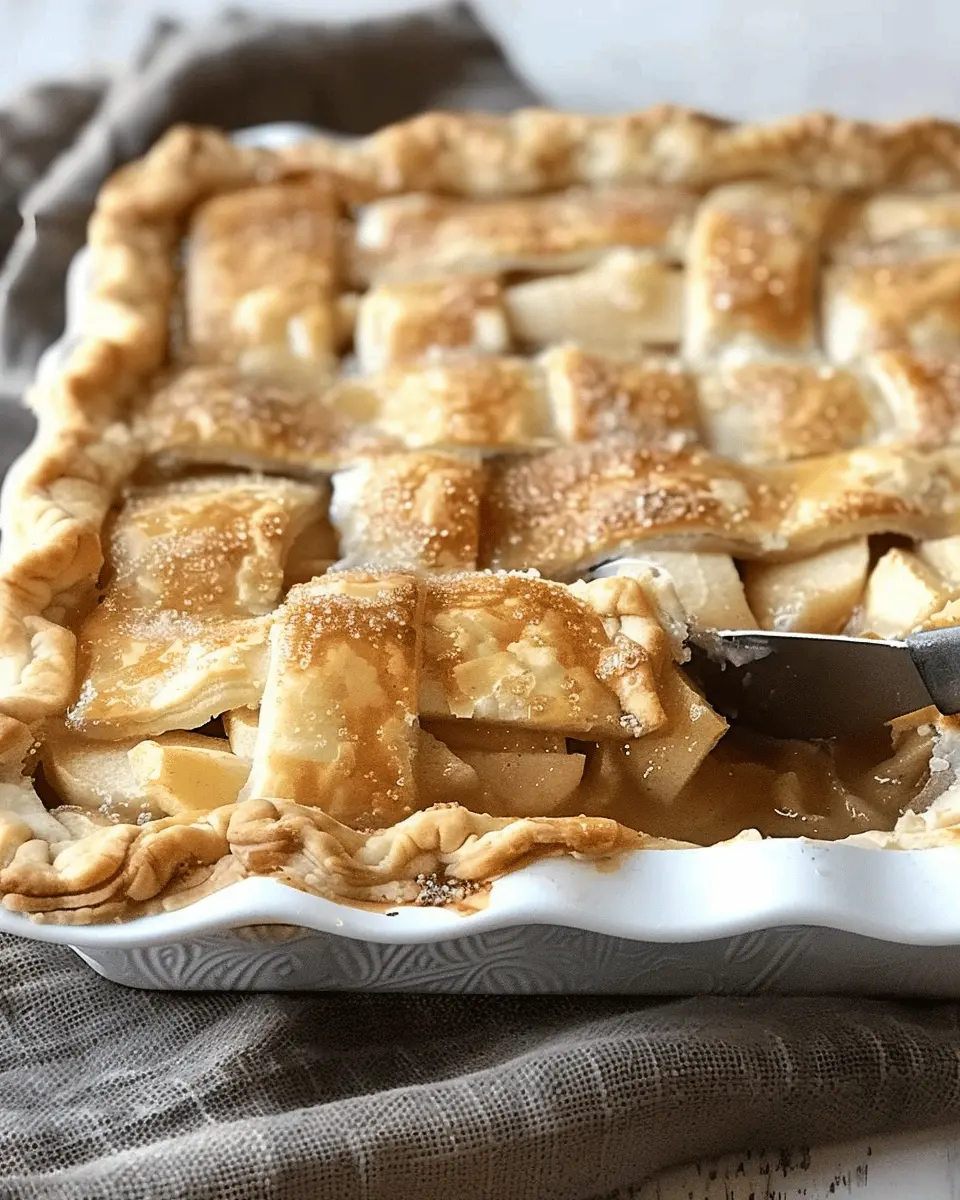
- Roll out the remaining dough for the top crust. You can either create a solid top crust or cut it into strips for a lovely lattice design—either way, the choice is yours! Ensure to create some ventilation if you seal it all up.
Baking to perfection
With your pie assembled, it’s time to bake!
- Place your assembled apple slab pie in the preheated oven.
- Bake for 45-50 minutes, or until the crust is golden brown and the filling is bubbling. You may want to cover the edges with aluminum foil if they brown too quickly.
- Rotate the baking sheet halfway through for an even bake.
Cooling and preparing for serving
Once the aroma of freshly baked apple slab pie has filled your kitchen, it’s crucial to let it cool.
- Remove the pie from the oven and place it on a wire rack. This cooling process allows the filling to set, making for easier slicing.
- Let it cool for at least 20-30 minutes before serving so you don’t burn your tongue!
Serve your pie warm with a scoop of vanilla ice cream or dollop of whipped cream for a delightful touch.
Making an apple slab pie is not just about the ingredients; it’s about the love and care that you put into each step. Enjoy the process, and happy baking!
Variations on Apple Slab Pie
Different apple varieties for a unique flavor
When it comes to crafting your apple slab pie, the variety of apples you choose can make all the difference. For a delightful tartness, consider using Granny Smith apples. Their firm texture holds up beautifully during baking and adds a refreshing zing. If you prefer a sweeter option, Honeycrisp and Fuji apples bring natural sweetness and juiciness that enhance the overall flavor profile.
Mixing different apple types can also create a more complex flavor. For instance, combining tart Granny Smith with sweeter Fuji can balance taste and texture perfectly. For a comprehensive guide to apple varieties, check out the USDA’s Apple Variety Chart.
Adding spices and flavor enhancements
Beyond apples, enhancing your apple slab pie with spices and flavorings can elevate it to new heights. Classic options like cinnamon and nutmeg are perfect for evoking that cozy, autumn feel. A pinch of ginger or even cardamom can add unexpected warmth and depth to your pie filling.
Don’t hesitate to incorporate some citrus zest—think lemon or orange—for that zesty brightness. You might even consider adding a splash of vanilla extract or almond extract to create an aromatic infusion.
And for those who love a little extra texture, try mixing in some chopped nuts, like pecans or walnuts. These add a satisfying crunch that contrasts beautifully with the tender apples. For those curious about more flavor-enhancing ingredients, sites like Serious Eats offer plenty of inspiration.
With these variations, your apple slab pie will not only taste divine but also impress everyone who has a slice!
Cooking Tips and Notes for Apple Slab Pie
How to achieve the perfect flaky crust
To create a delicious apple slab pie, a flaky crust is essential. Start with chilled ingredients: use cold butter and ice water when mixing your dough. This is crucial because it prevents the fat from melting and allows the layers to create that lovely flakiness. When rolling out your dough, try to handle it minimally; the more you work it, the tougher it gets. If you want to dive deeper into making the best pie crust, consider checking out this guide on pastry techniques.
Tips for preventing a soggy bottom
No one enjoys a soggy pie, right? To achieve that perfect apple slab pie, pre-baking your crust for about 10-15 minutes can help lock in those delicious flavors and prevent sogginess. Another trick is to sprinkle a thin layer of breadcrumbs or crushed crackers on the bottom before adding your apple filling; this absorbs excess moisture. Additionally, letting your filling cool slightly before piling it into the crust helps reduce steam. Trust me, these small tweaks make a world of difference!
Serving Suggestions for Apple Slab Pie
Best accompaniments to enhance flavors
When it comes to enjoying your apple slab pie, the accompaniments can elevate the experience to a whole new level. Consider pairing your slice with:
- Vanilla ice cream: The creamy texture complements the warm pie beautifully.
- Caramel sauce: A drizzle adds a rich sweetness that pairs wonderfully with the tartness of the apples.
- Whipped cream: Light and airy, it provides a perfect contrast to the dense pie.
Enhancing flavors with these options not only makes each bite more delightful but also impresses your guests.
For more inspiration, check out Food52 for creative serving ideas!
Creative ways to serve your pie
Serving apple slab pie doesn’t have to be ordinary. Think outside the box with these creative ideas:
- Individual portions: Cut small squares and serve them on pretty dessert plates for an elegant touch at dinner parties.
- Mini a la mode scoops: Rather than a full slice, serve a small piece with a scoop of ice cream on top—perfect for lighter portions.
- Breakfast treat: Why not enjoy a slice for breakfast? Serve it with a side of Greek yogurt and fresh berries to balance the sweetness.
By exploring these serving suggestions, you’re sure to turn your apple slab pie into a memorable part of any meal!
Time Breakdown for Apple Slab Pie
When you’re gearing up to make an apple slab pie, it’s helpful to know how your time will break down. Let’s dive right into the details!
Active Preparation Time
Expect to spend about 30 minutes actively prepping for your apple slab pie. This includes peeling and slicing the apples, mixing the spices and sugar, and rolling out your dough. It’s a fun and rewarding process, especially when you get to taste the fresh apples!
Inactive Preparation and Cooling Time
After your pie is assembled, set aside approximately 45 minutes for inactive prep and cooling. This allows the flavors to meld beautifully as the pie cools down, making every slice irresistible.
Total Baking Time
Baking the apple slab pie will take about 45 minutes in the oven. Keep a watchful eye as it bakes to ensure that golden perfection!
Feeling inspired? Don’t forget to check out this guide on baking tips to elevate your apple pie experience!
Nutritional Facts for Apple Slab Pie
When it comes to indulging in a slice of apple slab pie, it’s helpful to understand what you’re enjoying. Here’s a quick look at the nutritional facts to keep you informed!
Calories per Serving
Each serving of your delicious apple slab pie typically contains around 300-350 calories. This makes it a perfect treat to enjoy without too much guilt!
Breakdown of Macronutrients
- Carbohydrates: Approximately 48-55 grams per slice, thanks to the flaky crust and sweet apple filling.
- Fats: Roughly 10-15 grams, primarily from the buttery crust, giving it that irresistible texture.
- Proteins: About 2-4 grams, making it a delightful yet not overly filling dessert.
For more insights on American desserts and their health implications, you might want to visit the USDA website, which has a comprehensive database that can guide you through food choices. Remember, while it’s great to indulge, moderation is key for a balanced lifestyle!
FAQs about Apple Slab Pie
What are the best apples to use for this pie?
When choosing apples for your apple slab pie, think about flavor and texture. The best options include:
- Granny Smith: Known for their tartness that perfectly balances the sweetness of the filling.
- Honeycrisp: Offers a delightful crunch and a hint of sweetness.
- Braeburn: A great all-rounder with a mix of sweet and tart flavors.
Combining different varieties can create a more complex and interesting flavor profile. For more on selecting apples, check out this guide to apple varieties.
Can I make this pie ahead of time?
Absolutely! One of the best things about apple slab pie is that it can be made in advance. You can prepare the pie crust and filling, then assemble it the day before and store it in the fridge until you’re ready to bake. Alternatively, you can bake it ahead of time and simply reheat it in the oven when you’re ready to serve. This can be especially handy for hosting gatherings or holiday meals!
How should I store leftover pie?
If you have leftovers (and we hope you do!), it’s essential to store them properly to keep them fresh.
- Refrigerate: Cover the pie with plastic wrap or aluminum foil to keep it from drying out. It can last in the fridge for about 3-4 days.
- Freeze: For longer storage, slice the pie and wrap individual pieces in plastic wrap, then place them in a freezer-safe bag. It should maintain quality for about 2-3 months.
Wondering about warming it up later? Simply reheat individual slices in the microwave or pop them back in a preheated oven for that fresh-baked taste!
Making an apple slab pie is not just about a dessert; it’s about creating memories with every slice!
Conclusion on Apple Slab Pie
Recap of Why Homemade Pie Beats Fast Food
As we wrap up our delightful journey into the world of apple slab pie, it’s clear why making your own at home is unparalleled. Fast food options might be convenient, but they can’t compete with the freshness and richness of homemade goodness. Baking at home allows you to customize sweetness, choose organic apples, and craft a buttery crust that embodies comfort in every slice.
Not only does homemade pie fill your kitchen with a welcoming aroma, but it also allows you to create lasting memories with friends and family. So next time you crave a sweet treat, why not whip up an apple slab pie? You’ll be glad you did!
For more ideas on desserts and cooking, check out the resources at BBC Good Food and Epicurious.
PrintApple Slab Pie: The Best Easy Recipe for Homemade Bliss

A delightful and simple recipe for making an Apple Slab Pie that will impress your friends and family.
- Prep Time: 20 minutes
- Cook Time: 50 minutes
- Total Time: 1 hour 10 minutes
- Yield: 12 servings 1x
- Category: Dessert
- Method: Baking
- Cuisine: American
- Diet: Vegetarian
Ingredients
- 6 Granny Smith apples
- 1 cup granulated sugar
- 2 tsp cinnamon
- 1 tsp nutmeg
- 2 tbsp lemon juice
- 1/4 cup all-purpose flour
- 1 package refrigerated pie crusts
- 1 egg, beaten (for glazing)
Instructions
- Preheat your oven to 425°F (220°C).
- Peel, core, and slice the apples into thin pieces.
- In a large bowl, combine sliced apples with sugar, cinnamon, nutmeg, lemon juice, and flour. Toss to coat.
- Roll out one pie crust and place it in a large baking pan.
- Fill the crust with the apple mixture evenly.
- Roll out the second pie crust and place it over the apples. Seal the edges and cut slits for steam to escape.
- Brush the top crust with the beaten egg.
- Bake for 45 to 50 minutes or until the crust is golden brown.
- Let it cool before serving.
Notes
- Add a scoop of vanilla ice cream for an extra treat!
- Make sure the apples are evenly sliced for consistent cooking.
Nutrition
- Serving Size: 1 slice
- Calories: 250
- Sugar: 18g
- Sodium: 150mg
- Fat: 10g
- Saturated Fat: 3g
- Unsaturated Fat: 6g
- Trans Fat: 0g
- Carbohydrates: 37g
- Fiber: 2g
- Protein: 2g
- Cholesterol: 25mg
Keywords: Apple Slab Pie, homemade, dessert, easy recipe