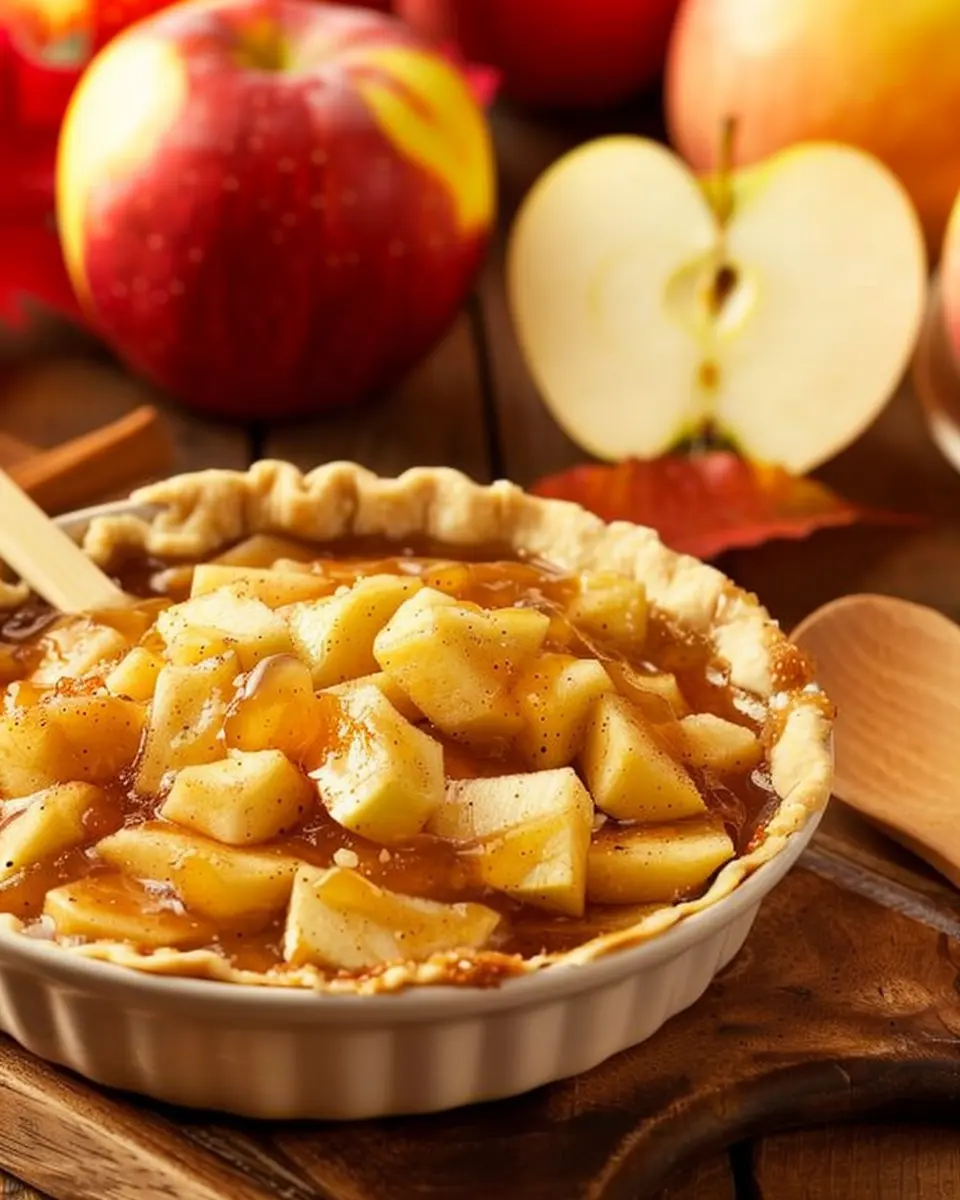
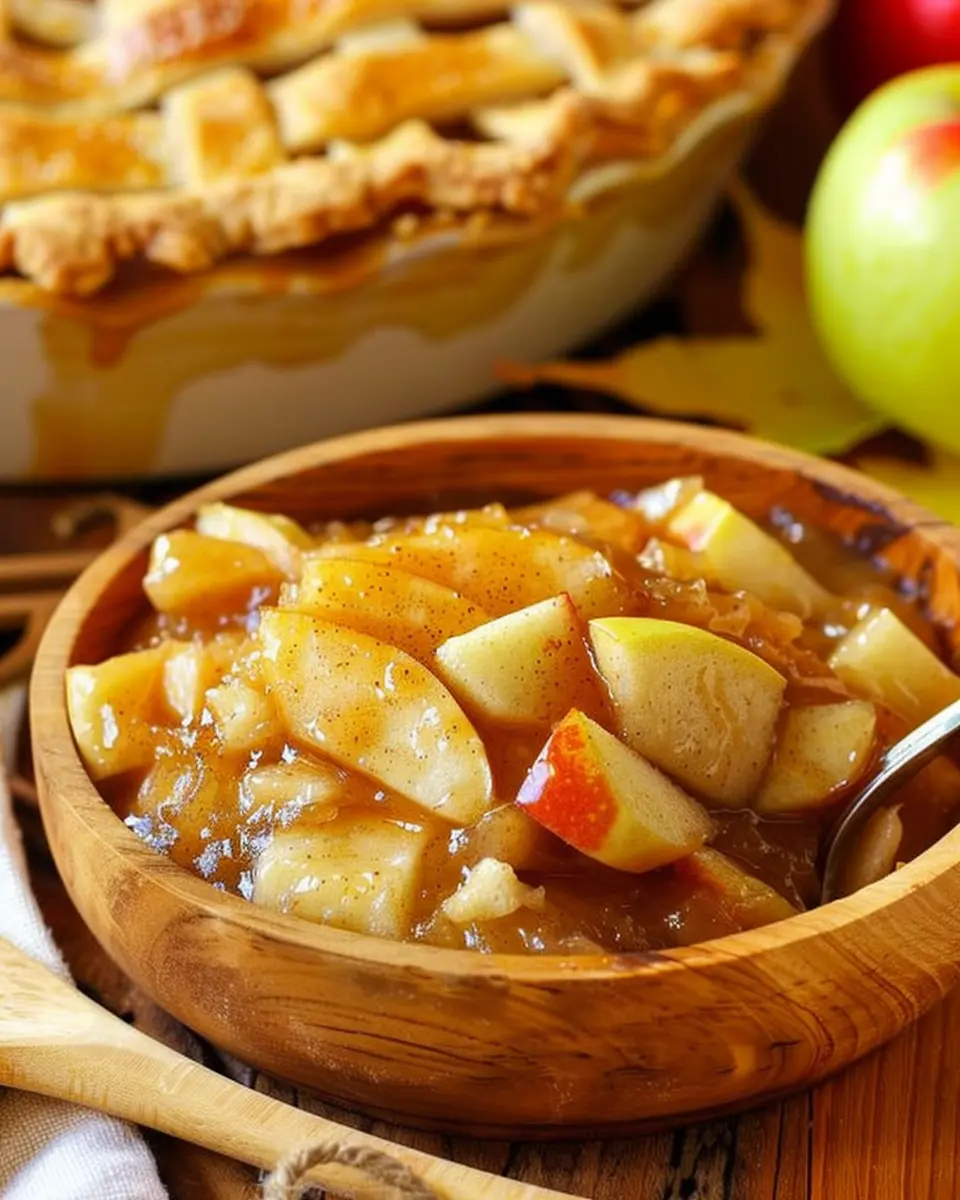
Introduction to Homemade Apple Pie Filling
Why make homemade apple pie filling?
When the craving for a warm slice of apple pie strikes, nothing quite beats the satisfaction of creating your own homemade apple pie filling. Sure, store-bought options are convenient, but they often lack the fresh flavor and wholesome ingredients that you can easily whip up in your own kitchen. In fact, a recent survey found that 65% of people believe homemade desserts taste better than their store-bought counterparts.
Making your own apple pie filling allows you to control the quality of the ingredients. You can choose organic apples, adjust the sweetness according to your taste, and add spices to create a truly personalized experience. As someone who loves to host gatherings, I’ve found that serving homemade treats always impresses guests. They love knowing that I put in the effort, and the flavors are simply incomparable!
The Benefits of Homemade Apple Pie Filling
- Quality Control: When you make your own filling, you know exactly what goes into it. Say goodbye to preservatives and artificial flavors.
- Customizable Flavor: Want a spicier pie? Add extra cinnamon or even a hint of nutmeg. Prefer it sweeter? Adjust the sugar levels to your liking.
- Freshness: There’s something magical about using freshly picked apples in your pie. The quality and taste can elevate your dessert to a whole new level.
If you’ve never thought about making your own filling, let me ask you this: when was the last time you had a dessert that truly wowed you? Making your own filling is an adventure worth embarking on. And if you find yourself needing tips or inspiration, websites like Allrecipes offer great resources to kickstart your journey.
As you gather your ingredients, remember that the heart of a fantastic apple pie lies in its filling. Whether you’re preparing for a festive gathering or just looking to treat yourself, your homemade apple pie filling is sure to delight. Let’s dive into the steps to get this delicious pie on your table!
Ingredients for Homemade Apple Pie Filling
Creating the perfect homemade apple pie filling begins with the right ingredients. Here’s what you’ll need for a delightful and comforting filling that’ll impress friends and family:
- Apples: Use a mix of sweet and tart apples, like Granny Smith and Honeycrisp. This combination adds depth. You’ll want about 6-8 cups of peeled and sliced apples.
- Sugar: Add sweetness with ¾ to 1 cup of granulated sugar or brown sugar, depending on your preference.
- Cinnamon: A go-to spice! About 2 teaspoons will bring warmth to your filling.
- Nutmeg: Just a pinch (½ teaspoon) enhances the flavor profile beautifully.
- Lemon Juice: Around 2 tablespoons will balance the sweetness and prevent browning.
- Cornstarch: Use 2 tablespoons to help thicken the filling, creating that perfect gooey texture.
Using these simple ingredients, you can create a homemade apple pie filling that’s not just delicious but also a great starting point for any pastry project. Want to learn more about selecting the best apples? Check out this guide!
Step-by-Step Preparation of Homemade Apple Pie Filling
When it comes to homemade desserts, few things can rival the comfort and warmth of a classic apple pie. The secret to an irresistible pie lies in the filling, and making your very own homemade apple pie filling is much simpler than you might think. With just a few steps, you’ll be on your way to creating a delicious treat that will impress family and friends alike.
Gather and prepare the apples
The first step in crafting your homemade apple pie filling starts with selecting the right apples. Look for a mix of sweet and tart varieties to achieve a balanced flavor. Some popular choices include:
- Granny Smith (for tartness)
- Honeycrisp (for sweetness)
- Fuji (for a juicy texture)
Once you’ve got your apples:
- Wash and peel: Clean the apples thoroughly to remove any dirt or wax. Next, peel them using a vegetable peeler or a paring knife.
- Core and slice: Remove the core using an apple corer or a knife, then slice the apples into even pieces, about 1/4 inch thick. This ensures they cook evenly later on.
- Toss with lemon juice: To prevent browning, toss your prepared apple slices with a tablespoon of lemon juice. This will also add a touch of brightness to your filling.
Combine sugars and spices
The next step is where the magic happens: flavoring your apples. In a medium bowl, you’ll want to combine your sugars and spices. Here’s what you’ll need:
- 1/2 cup granulated sugar
- 1/4 cup brown sugar
- 1 teaspoon ground cinnamon
- 1/4 teaspoon nutmeg
- A pinch of salt
Mixing it up:
Whisk these ingredients together until they’re well-combined. The cinnamon and nutmeg will really elevate the flavor of your homemade apple pie filling, giving it that signature warmth and depth. Don’t hesitate to adjust the spices to suit your taste. Some people even enjoy adding a dash of ginger for an extra zing or a spoonful of vanilla extract for sweetness. Check out this helpful article on apple pie spice variations.
Cook the apple mixture
Now comes the fun part: cooking those apples down.
- In a large skillet or saucepan, melt 2 tablespoons of butter over medium heat.
- Add in your prepared apple slices, stirring gently to coat them in butter.
- Sprinkle the sugar and spice mixture over the apples and stir well.
Cooking process:
- Cook the mixture for about 8-10 minutes or until the apples begin to soften but still retain their shape. Remember, they’ll continue to cook in the oven, so you want them to be slightly al dente.
- If you like your filling a bit saucy, add 1-2 tablespoons of apple cider or water to enhance the flavor.
Cool the filling
Once your apples have cooked and you can smell that heavenly aroma filling your kitchen, it’s time to let them cool.
- Transfer the apple filling to a bowl and let it sit at room temperature for about 15-20 minutes. This cooling period is crucial before using it in your pie crust to avoid a soggy bottom.
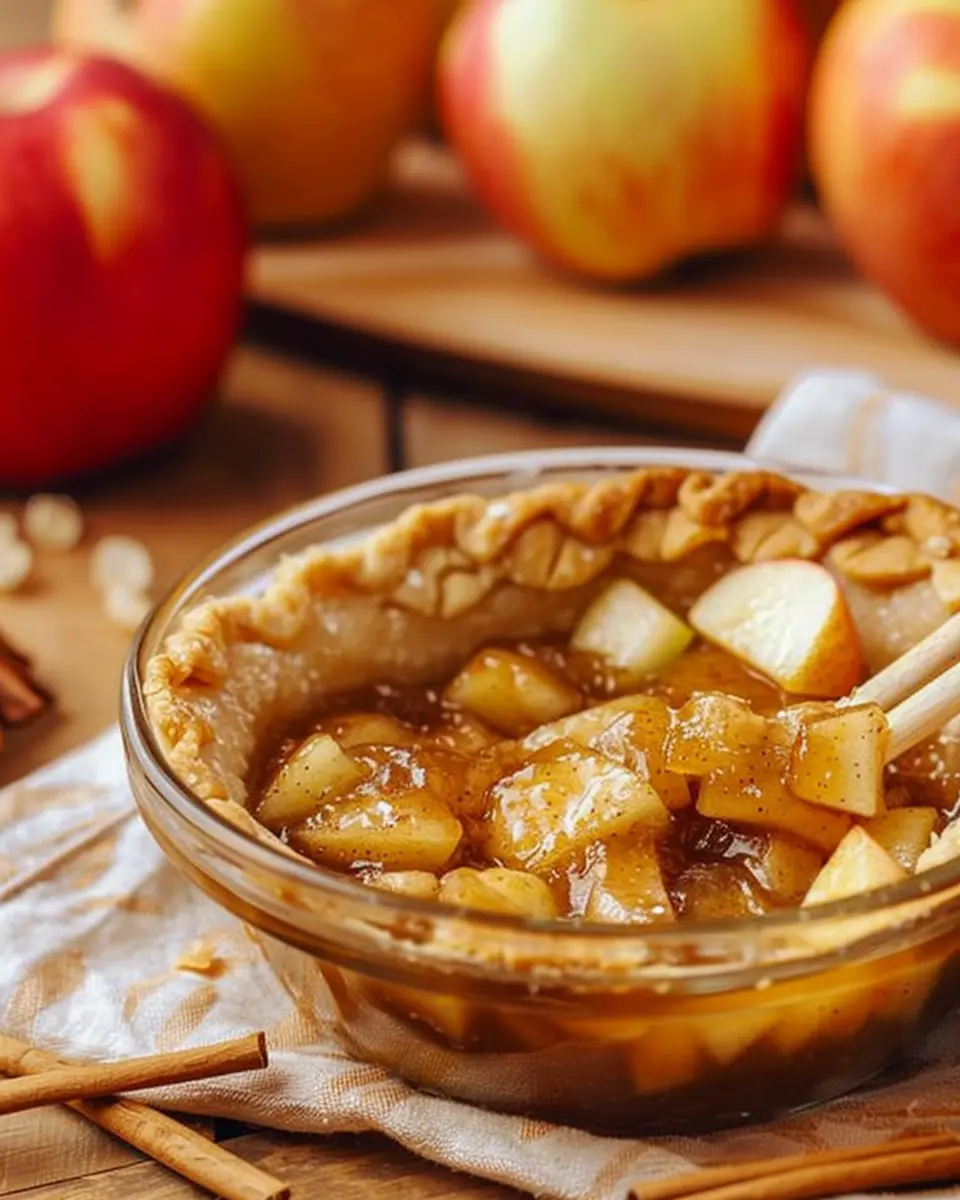
Store or use the filling
Now that you’ve created your homemade apple pie filling, you have a couple of options on how to proceed:
- Use immediately: If you’re ready to bake your pie, go ahead and fill your crust with this delicious mixture.
- Store for later: If you want to save it for later, allow the filling to cool completely and then place it in an airtight container. It can be stored in the freezer for up to three months or refrigerated for up to a week.
Final thoughts
With these simple steps, you’ve successfully made your own homemade apple pie filling. It’s a fantastic way to bring a piece of classic comfort to your table. Plus, knowing that you’ve made it yourself adds a personal touch that’s hard to beat. Whether you’re baking for a special occasion or just treating yourself, this recipe is sure to bring joy. Happy baking!
Variations on Homemade Apple Pie Filling
Spiced Apple Pie Filling with Additional Flavors
If you’re looking to elevate your homemade apple pie filling, think about incorporating some extra spices or flavors. A dash of nutmeg or ginger can add a warm, cozy note that complements the tartness of the apples beautifully. For a twist, try adding some vanilla extract or a splash of fresh citrus juice to brighten things up. You might also consider tossing in dried fruits like cranberries or raisins for added sweetness and texture.
Want to take it a step further? Why not experiment with flavor infusions? Adding a hint of almond extract or a sprinkle of cardamom can create a unique blend that will impress your friends and family. Trust me—your taste buds will thank you!
Gluten-Free and Low-Sugar Options
For those with dietary concerns, you can still enjoy the flavors of homemade apple pie filling without sacrificing taste. Using a gluten-free all-purpose flour blend can make your filling equally delicious for those avoiding gluten. Simply replace traditional flour with this gluten-free option in any recipe, and you won’t even notice a difference!
If sugar is a concern, consider substituting with alternatives like stevia or monk fruit sweetener. These low-calorie options hold up well in recipes, allowing you to maintain both sweetness and flavor without the extra calories. Remember, it’s all about balancing the sweetness while allowing the natural flavors of the apples to shine through.
Experimenting with these variations not only personalizes your homemade apple pie filling but also opens the door to culinary creativity. Don’t hesitate to explore recipes from trusted sites like AllRecipes or Bon Appétit for inspiration!
Cooking Tips and Notes for Homemade Apple Pie Filling
Creating delicious homemade apple pie filling is all about choice and balance. Here are a few tips to elevate your pie game!
Choosing the Right Apples
Not all apples are created equal for pie filling. Opt for a mix of tart and sweet varieties, such as Granny Smith and Honeycrisp. This balance brings depth of flavor to your filling, making each bite a delightful experience.
The Perfect Spice Ratio
Cinnamon is a classic choice for apple pie, but don’t shy away from experimenting! A pinch of nutmeg or a drizzle of vanilla extract can make your filling pop. Fun fact: Studies show that a well-seasoned apple filling enhances overall pie enjoyment.
Thickening Agents
To achieve a perfectly thick filling that doesn’t make your pie soggy, consider using cornstarch or flour. These options help absorb excess moisture, so your pie crust stays crisp. A general rule of thumb? Use about 1 tablespoon per cup of apple slices.
Let it Rest
After preparing your homemade apple pie filling, let it sit for about 15 minutes. This resting period allows the flavors to meld beautifully. Plus, it keeps your apples from turning mushy when baked.
Storage Tips
If you’re making your filling ahead of time, store it in an airtight container in the fridge for up to a week, or freeze it for up to three months. Just remember to let it thaw completely before using!
With these homemade apple pie filling tips, you’re ready to impress at your next gathering. For further inspiration, check out The Spruce Eats for more delicious recipes!
Serving Suggestions for Homemade Apple Pie Filling
Homemade apple pie filling is not just for pie! Here are some delightful serving suggestions that will inspire you to get creative in the kitchen.
Classic Apple Crisp
Combine your homemade apple pie filling with a simple oat topping for a quick apple crisp. Just layer the filling in a baking dish, sprinkle over a mix of oats, brown sugar, and butter, and bake until golden brown. It’s a cozy dessert that feels like a warm hug.
Pancake Topping
Ditch the syrup! Pour apple pie filling over fluffy pancakes for a delicious breakfast twist. A dollop of whipped cream or a drizzle of maple syrup can elevate it even further.
Ice Cream Surprise
For a simple yet indulgent treat, warm your homemade apple pie filling and serve it over a scoop of vanilla ice cream. The combination of warm apples and cold ice cream is simply divine.
Savory Pairing
Did you know that apple pie filling can complement savory dishes? Try adding it to grilled cheese sandwiches or turkey bacon wraps for an unexpected flavor boost.
With these suggestions, your homemade apple pie filling will shine in various delightful dishes! For more ideas, check out Serious Eats or Food Network for inspiration. Happy cooking!
Time Breakdown for Homemade Apple Pie Filling
When it comes to making homemade apple pie filling, understanding the time needed can make your kitchen experience even more enjoyable. Here’s how to break it down:
Preparation Time
Spend about 15-20 minutes peeling, coring, and slicing those lovely apples. This is also the perfect moment to gather your spices and sugar to ensure everything is at your fingertips.
Cooking Time
Next, you’ll want to dedicate around 15-25 minutes on the stovetop. This allows the apples to soften and meld beautifully with the sugar and spices, creating that signature flavor.
Cooling Time
After cooking, let your homemade apple pie filling cool for about 30 minutes. It’s crucial for achieving the right consistency and helping the flavors deepen.
Total Time
In total, you’re looking at approximately 1 to 1.5 hours from start to finish. Not too bad for something that’ll impress your friends and family! Remember, homemade is always worth it, especially when your kitchen smells like autumn.
For more tips on pie making, check out BBC Good Food for great ideas and inspiration!
Nutritional Facts for Homemade Apple Pie Filling
Calories per serving
When you indulge in homemade apple pie filling, it’s good to know what you’re serving up. A typical serving (about half a cup) contains around 150-200 calories, depending on the sweetness and variety of apples you choose.
Key nutrients
Beyond just calories, this delightful treat packs some nutritious benefits:
- Fiber: Apples are a great source of dietary fiber, which aids in digestion.
- Vitamin C: Helps boost your immune system and promote healthy skin.
- Antioxidants: Apples contain beneficial compounds that may reduce inflammation and lower the risk of chronic diseases.
Making your own filling means you can control the sugar and spice! For more tips on nutritious cooking, check out Healthline for expert advice. As you enjoy your pie, remember, you’re not just treating your taste buds but also nourishing your body!
FAQs about Homemade Apple Pie Filling
How long can I store homemade apple pie filling?
When it comes to homemade apple pie filling, proper storage is essential for maintaining its deliciousness. You can store your apple pie filling in the refrigerator for up to a week in an airtight container. Alternatively, if you’re looking to enjoy your filling over a longer period, consider freezing it. In the freezer, homemade apple pie filling can last for about 6-12 months. Just make sure to use freezer-safe containers or bags, removing as much air as possible before sealing to prevent freezer burn. When you’re ready to use it, simply thaw it in the fridge overnight.
Can I use different types of apples?
Absolutely! One of the best things about making homemade apple pie filling is the flexibility in the types of apples you can use. While Granny Smith apples are popular for their tartness, a mix of sweet and tart varieties can elevate your filling. Consider using:
- Honeycrisp for a sweet crunch
- Fuji for their juicy sweetness
- Braeburn for a balance of sweet and spicy
- Cortland which holds its shape well during cooking
Experimenting with different apples can bring unique flavors and textures to your filling, so don’t hesitate to get creative!
What desserts can I use this filling for?
The versatility of homemade apple pie filling goes beyond just pie! Here are a few delightful ways to use it:
- Crisps or crumbles: Top with oat topping and bake until golden.
- Pancakes or waffles: Spoon some filling over your breakfast for a sweet treat.
- Danish pastries: Fill with your favorite dough for a delicious dessert.
- Ice cream toppings: Warm it up and serve over vanilla ice cream for a cozy dish.
With so many options, you can enjoy your homemade apple pie filling in various ways that suit your daily cravings!
Conclusion on Homemade Apple Pie Filling
Creating your own homemade apple pie filling is not just about flavor; it’s about embracing a timeless tradition. With every spoonful of this delightful filling, you infuse your culinary endeavors with warmth and nostalgia. The process is simple yet rewarding, allowing you to customize the sweetness and spices to perfectly suit your taste.
Imagine the joy of sharing this pie filling with friends and family, transforming any gathering into a cozy celebration. So, roll up those sleeves, grab your favorite apples, and get ready to craft a filling that will impress everyone. For more recipes and tips on pie-making, check out Epicurious or Bon Appétit.
PrintHomemade Apple Pie Filling: The Best Recipe for Comfort Food
A warm and delicious filling perfect for apple pies.
- Prep Time: 15 minutes
- Cook Time: 45 minutes
- Total Time: 1 hour
- Yield: 1 pie filling 1x
- Category: Dessert
- Method: Baking
- Cuisine: American
- Diet: Vegetarian
Ingredients
- 6 cups sliced apples
- 1 cup sugar
- 2 tablespoons lemon juice
- 2 tablespoons all-purpose flour
- 1 teaspoon cinnamon
- 1/4 teaspoon nutmeg
Instructions
- Preheat the oven to 425°F (220°C).
- In a large bowl, combine apples, sugar, lemon juice, flour, cinnamon, and nutmeg.
- Mix well until apples are fully coated.
- Pour the filling into a prepared pie crust.
- Bake in preheated oven for 15 minutes.
- Reduce heat to 350°F (175°C) and continue baking for 30-40 minutes.
- Cool before serving.
Notes
- Use a mix of tart and sweet apples for best flavor.
- Adjust sugar to taste based on the sweetness of the apples.
Nutrition
- Serving Size: 1 slice
- Calories: 200
- Sugar: 18g
- Sodium: 5mg
- Fat: 1g
- Saturated Fat: 0g
- Unsaturated Fat: 0g
- Trans Fat: 0g
- Carbohydrates: 48g
- Fiber: 3g
- Protein: 1g
- Cholesterol: 0mg
Keywords: Homemade Apple Pie Filling,Apple Pie,Comfort Food